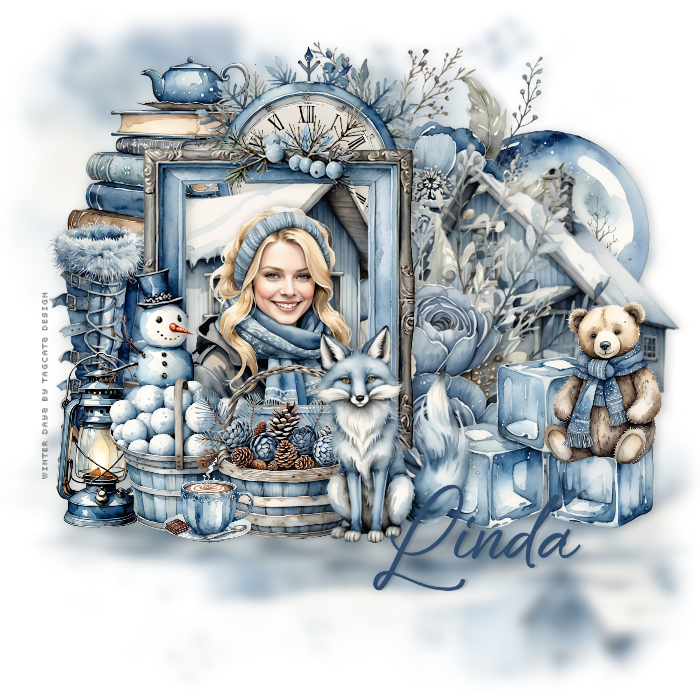
I always fill that with white - makes it easier to see what I'm doing! And then delete it at the end Open paper 1, copy, close, paste as new layer Load your mask with source luminance, fit to canvas and hide all mask checked Merge group Adjust, Blur, Gaussian Blur 5 Duplicate this layer and then pull down from the top node until you have something like this:  Adjust, Blur, Gaussian Blur 5 Merge down Open element 3, resize to 400 width, flip horizontal, copy, close, paste as new layer Move to the left Open whichever tube you'd like to use, resie to 400 width, copy, close and paste as new layer Move her over the fram and resize until she mostly fits into the frame Duplicate this layer and move below the frame Click the top woman image and erase any bits that cover part of the snowman Click the mask layer to activate it - we'll put all the elements behind the frame and work forward Open element 1, resize to about 226 width, copy, close, paste as new layer Move up and to the right side Open element 50, resize to about 250 width, copy, close, paste as new layer Move to the top left Open element 70, resize and move to the top corner of the picture frame and overlapping the snow globe Open element 42, resize and move to the right side, overlapping a bit of the flower and the snow globe Open element 67, resize to about 400 width, copy, close, paste as new layer Open element 12, resize and move to the right side Open element 6, resize and "sit" him on the ice cubes Open element 11, resize and move so it's behind the woman's head Open element 17, resize and move to the left side Open element 36, resize and move down in front of the boots Open element 43, flip horizontal, resize and put behind the woman Click your top layer to activate it Open element 35, resize and move to the bottom left of the frame Open element 45, resize and move beside the snowballs Open element 55, resize and love in front of the baskets Open element 8, resize and move to the bottom right of the frame Go through your layers to repositon anything you might need to, then give them a drop shadow I used 0, 4, 17, 13, black If you're going to resize, do that now before adding any text Remove the white background layer Add your credit info - I used Pixelette, black and rotated it to the left side, then reduced opacity to 50% For my text I used Bonestay, ##2f4d6f and give it a drop shadow of 0, 3, 17, 3, black Merge visible and save as a png file I hope you enjoy your new tag! |