Open paper 8, resize to 700 width, copy, close, paste as new layer Layers, load save mask, load mask from disk, choose Mask 65 with Source Luminence, Fit to Canvas and Hide All Mask checked Merge group Adjust, Blur, Gaussian Blur, 5 Duplicate the mask layer, and then pull down from the top until you have something like this:  Open element 107, resize to 500 x 500, copy, close, paste as new layer Set your background to null and foreground to a bright yellow With your preset shapes tool, width at 3, pull a circle over the globe part of the image Once you have it positioned, click inside the circle with your magic wand Layer, new raster layer Duplicate this layer Duplicate this layer - you should now have the original vector layer and three blank layers Make sure you're on the top blank layer Effects, Plugins, Vanderlee Snowflakes: 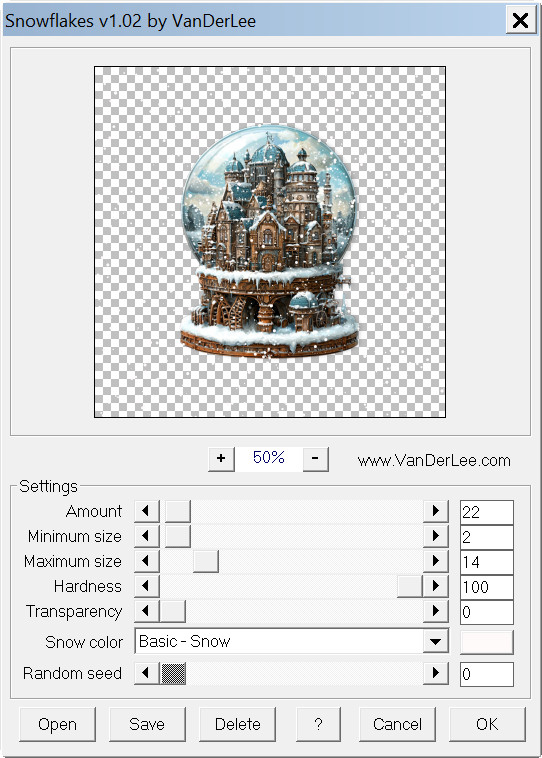 Move to the middle blank layer, repeat snowflakes but change the random seed Move to the bottom blank layer, repeat snowflakes but change the random seed Select none Delete the vector layer with the yellow circle on it Click your mask layer to activate it I put elements 6, 121, 88 and 30 behind the globe, and element 55 rotated left 90 - all resized Click the top snow layer to activate it Open element 112, resize and move to the right side Open element 15, resize and move down a bit and to the right side Open the Santa tube, resize to 400 x 400, copy, close, paste as new layer Open element 60, resize and move down and to the right Open element 64, flip horizontal, resize and move down and to the left Open element 14, move down to the left in front of the elf Opem element 119, move down to the bottom right Open element 117, flip horizontal, resize and move down Open element 41, resize and move down to the left of the teddy Add drop shadows to your elements, I used 0, 4, 17, 12 black Add your watermark and script Save as pspimage Click your top snow layer to activate it The eye needs to be open on the top snow layer and closed on the middle and bottom snow layers Edit, copy special, copy merged Go to AS and paste as new layer Back to PSP, close the eye on the top snow layer Open the eye on the middle snow layer and on this layer to activate it Edit, copy special, copy merged and go to AS and paste after current frame Back to PSP, close the eye on the middle snow layer Open the eye on the bottom snow layer and click on this layer to activate it Edit, copy special, copy merged and go to AS and paste after current frame Save as a gif file Thanks for doing my tut! |