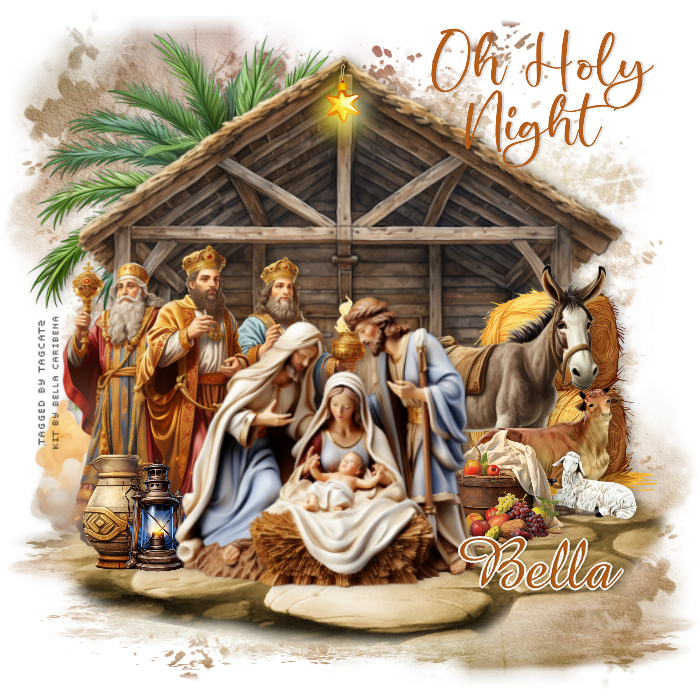
Open paper 17, resize to 700 x 700, copy, close and paste as new layer Layers, load save mask, load mask from disk choose Mask65 MBandSW with source luminance, fit to canvas and hide all mask checked Merge group Duplicate this layer Pull down from the top until you have something like this:  Open element 51, copy, close and paste as new layer, then move down Open element 19, resize to about 500 width, copy, close and paste as new layer Move up a bit Open element 43, resize and place to the left side, and then move this below the stable layer Click the stable layer to activate it Open element 58, resize quite small, paste as new layer and position at the peak of the stable Open element 28, resize and move to the right side Open element 18, flip horizontal, resize and move to the right overlapping the hay bales Open element 41, resize and move to the right, overlapping the donkey and the straw bales Open element 60, resize and move to the right, overlapping the donkey Open element 45, resize and move to the left side I added one of the pottery pieces and the lantern, resized in front of the wise men Open element 5, resize and move down a bit Go through your layers and add drop shadows to your elements I used 0, 4, 27, 12, black If you're going to resize the tag, do that now before adding any text I used two different script fonts for the text For O Holy Night, I used #b45c19 and gave it a drop shadow of 0, 2, 17, 2, black For the name, I used the same color, converted to raster Selections, select all, Selections, float Selections, defloat Selections, modify, select selecton borders, Outide, 2, anti alias checked New raster layer Fill with white Drop shadow, 0, 2, 17, 2, black Select none and merge down Position where you like it Merge visible and save as a png file Thanks for trying my tut - enjoy your new tag! |