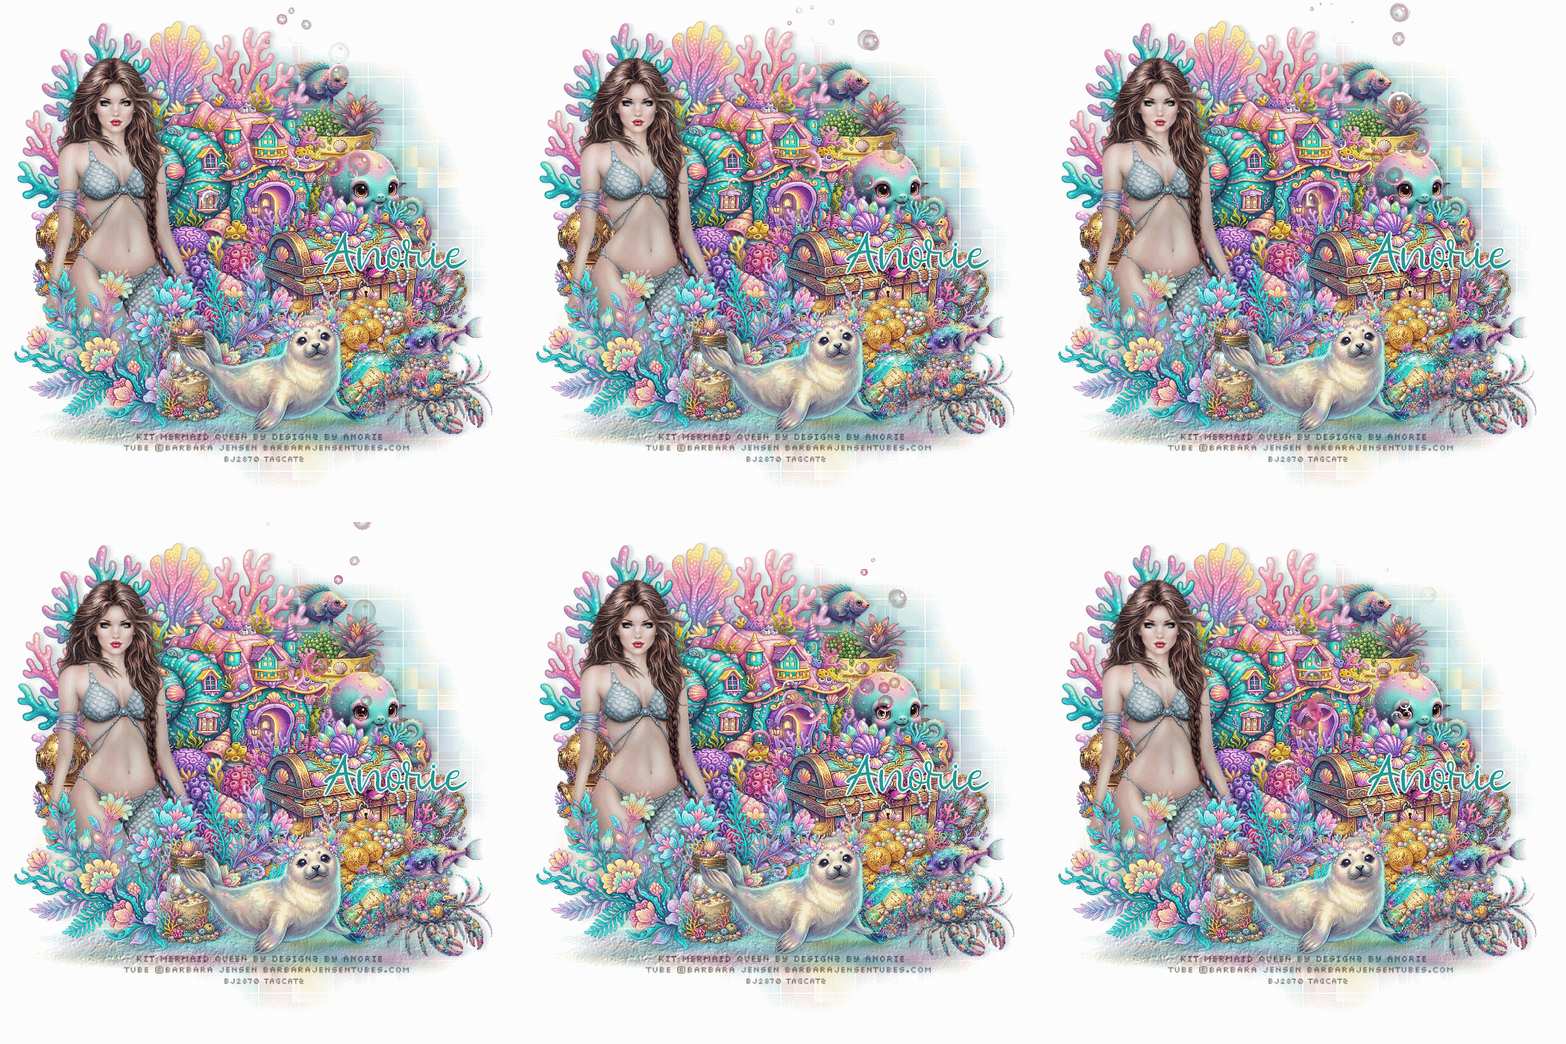
Open a new transparent image 700 x 700 - you can resize later if you like Flood fill with white Open paper 14, resize to 700 width, paste as new layer Load your mask with source luminance, fit to canvas and hide all mask checked Merge group Effects, plugins, Neology, Blend Mosaic, tile size 28, click ok Layers duplicate With you pick tool pull down from the top to make "sand" at the bottom of your mask layer Effects, texture effects, texture and select the texture you saved with the following settings 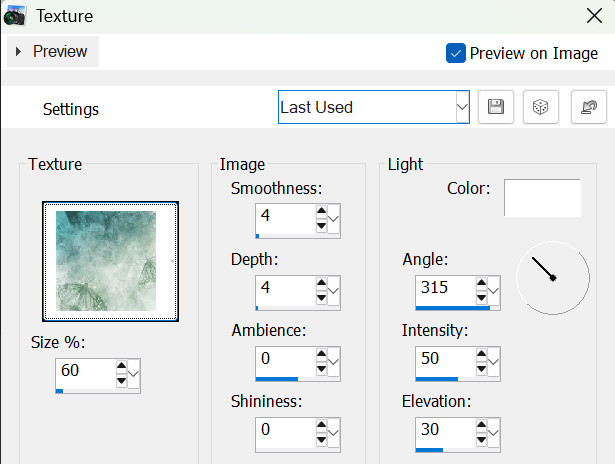 Open element 80, resize quite small and move up and to the right a bit Open element 40, resize to about 410 width, move up to the top left Open element 14, resize to about 300 width, move up to the right Open element 99, resize to about 225 width, move up to the right Open element 54, resize to about 150 width, move down a bit and to the right Open element 66, resize to about 400 width, move up and very slightly left Open element 7, resize to about 400 width, move down a bit so it overlaps the bottom of the house Open element 70, resize to about 300 width, move down and to the right Open element 67, resize to about 300 width, move down and to the right Open element 76, resize quite small and move down to the bottom and slightly right Open element 30, flip horizontal, resize small and move to the bottom right of the tag Open element 85, resize quite small and move down and to the right, above the lobster Open element 49, resize to about 15 width, move to the left side Open your Barbara Jensen tube, resize to about 330 width, move to the left side Open element 17, resize to about 400 width, move down in front of the bottom part of the tube Open element 27, resize quite small, move to the bottom and slightly left Open element 86, resize to about 300 width, move to the bottom center Go through your layers and add drop shadows to your elements - I used 0, 5, 17,12, black Add credits, copyrights and your name - I used Pixelette, black for this For my text, I used Molly Mermaid, #239f91 in background, foreground closed Convert to raster layer Selections, select all Selections, float Selections, defloat Selections, modify, select selection borders, 2 outside New raster layer and fill the selection with white Give it a drop shadow - I used 0, 5, 5, 5, black Select none Merge down Position where you want it on your tag If you are NOT animating, delete the white background layer, merge visible and save as a png file To animate Starting with the house layer, merge down to and including the white background layer Copy this merged layer and go to PSP Paste as new animation Duplicate until you have 15 frames and then minimize for now Open mng animation file 1206 from Sophisticat Simone's Package 427 Edit, select all Edit, copy and close Maximize your tag frames Edit, select all Make sure your slider is all the way to the left so Frame 1 is on your screen Edit, paste into selected frame - in Frame 1 Position where you want it, and then click once to set it in place Minimize your tag frames again Back to PSP Close the eye on the merged bottom layer Click any other layer to activate it Edit, copy special, copy merged Back to Animation Shop Edit, paste as new animation Duplicate until you have 15 frames Edit, select all Edit, copy and then close Maximize your tag frames again Edit, paste into selected frame - again Frame 1 Position where you want it and click once to set in place Save as a gif file Thanks for trying my tutorial - enjoy your tag!!! |