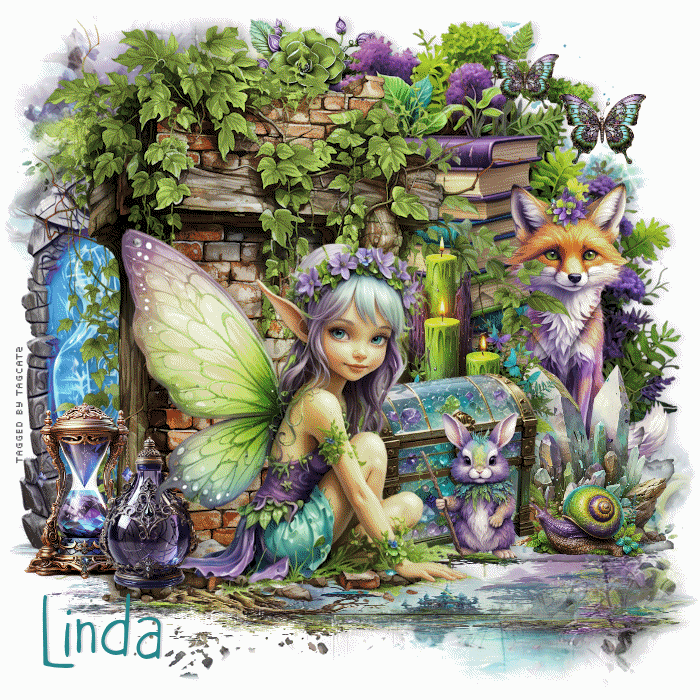
Open a new transparent image 700 x 700 - you can resize later if you like Fill with white Open paper 10, resize to 700 width, copy, close, paste as new layer Layers, load save mask, load mask from disk with Source Luminance, Fit to Canvas and Hide All Mask checked Merge group Duplicate the mask layer, then pull down from the top until you have something like this: 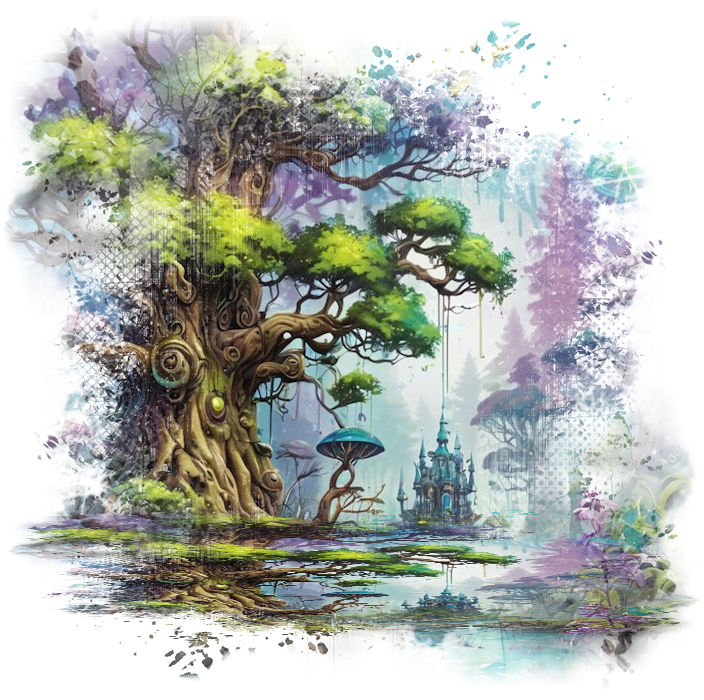 Open element 5, copy, close, paste as new layer, move to the left side Open element 4, resize to 400 width, copy, close, paste as new layer, move to the top right Open element 48, resize and move to the right side Open element 52, resize and move to the right and down, in front of the fox Open element 49, resize quite small, move down and to the bottom right Open element 13, flip horizontal, resize to about 500 width, copy, close, paste as new layer, move to the left side overlapping the magic stones Add some decorative elements to the left side - I used the hourglass and a bottle - both resized Open element 68, resize and move down a bit and to the right Open element 54, resize and put in front of the candles Open one of the creatures, resize and put in front of the box - I used the rabbit, but there are lots to choose from Open element 2, resize to about 400 width, copy, close, paste as new layer and move down and to the left If you're going to resize the tag, do that now before adding any text Add drop shadows to your elements - I used 0, 4, 18, 12, black Add your watermark - I used Pixelette, black and then reduced opacity to 50% Add your text - I used Pumpkins Candles, #24848c and added a drop shadow of 0, 2, 18, 2, black Merge visible Open element 30, resize quite small, and paste to the top right Close the eye on the butterfly layer Copy the merged layer Go to AS and paste as new animation Duplicate until you have 16 frames Minimize for now Back to PSP, open the eye on the butterfly layer, copy and go to AS Paste as new animation Effects, Insert Image Effect - choose Compress from the menu: 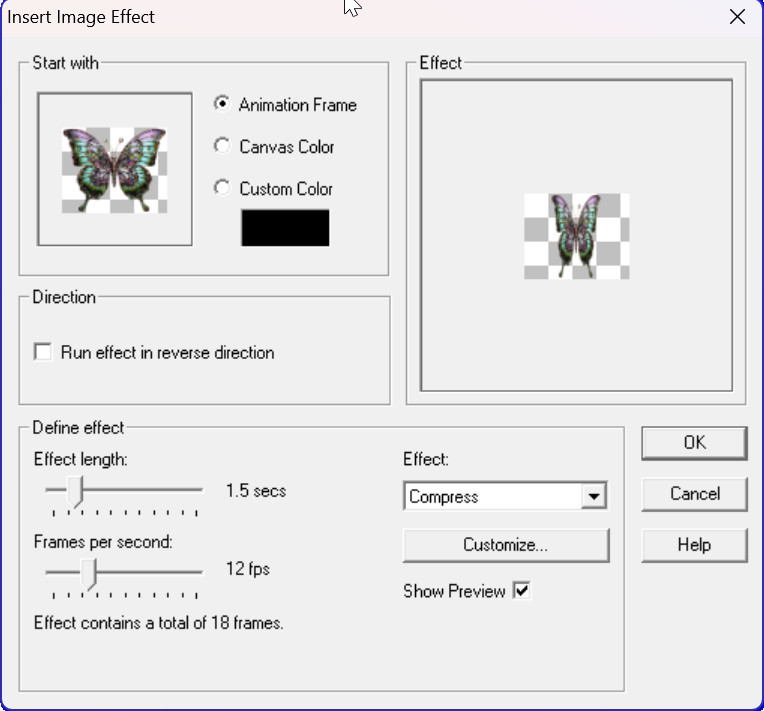 Edit, select all Animation, cull animation, every 5 frames Edit, copy and minimize Maximize your tag Edit, select all Make sure your slider at the bottom is all the way to the left side so you can see frame 1 Edit, paste into selected frame, position and click once to set it in place If you want a second butterfly a bit smaller, click Animation, Resize Animation and choose the size you want Again, select all, copy and close Paste into selected frame, position and click to set in place Save as a gif file Thanks for trying my tut - enjoy your tag! |