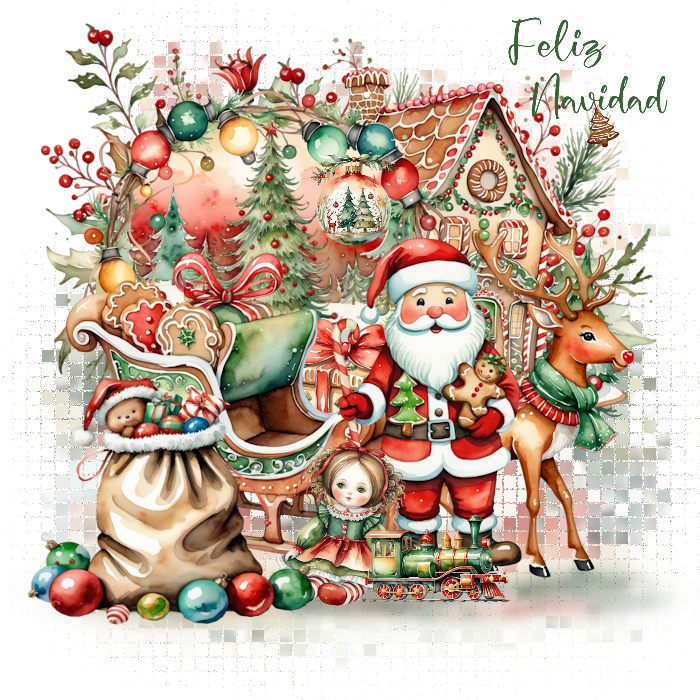
Load your mask with Source Luminance, Fit to Canvas and Hide All Mask checked Merge group Effects, Texture Effects, Mosaic Antique Layers, Properties, set opacity to 60 Layers duplicate, and then pull down from the top, and Adjust, Blur, Gaussian Blur, 5:  Open element 1, resize and move to the right and up a bit Open element 5, resize to about 400 width, copy, close and paste as new layer Move up and to the left a bit With your Magic Wand, click inside the wreath Selections, Modify, Expand, 20 New raster layer Open one of the papers you like, copy, close and paste into selection Select None and move below the wreath layer Click your mask layer to activate it Open element 14, copy, close and paste as new layer Move up and to the left Duplicate this layer and move to the right side Click the wreath layer to activate it Open element 22, resize and move down a bit Open element 32, resize to about 400 width, copy, close, paste as new layer Move down and to the left Open element 35, resize and move to the right and down a bit Open element 43, resize and move down a bit and to the right I resized elements 11 and 18 and put in front of Santa And then element 20, in front of the sleigh to the left side Go through your layers and add drop shadows to your elements I used, 0, 4, 27, 13, black If you're going to resize the tag, do that now before adding text For text I used #3c6b3a, font is Airnon, drop shadow of 0, 2, 17, 2, black Add your watermark too - I used Pixelette, black and reduced opacity to 50 Merge visible and save as a png file I hope you enjoy your new tag! |