
NOTE: This is a double animation tut, so it might look long, but it's easy to follow and the result is very pretty!
This tutorial is © tagcatz design 2026. It may not be copied or reproduced in whole or in part without my written permission
This tutorial assumes a basic working knowledge of PSP and Animation Shop - although you can make the tag without animation if you prefer
PTU Scrap kit is Timeless Grace from Savage Dezines, available at her store HERE
If you need Animation Shop, its free to download HERE
The candle animation is created using the plugin Eye Candy 4000 and you can download it HERE
The sparkle animation is in Pack 449 from Sophisticat Simone which can be purchased from her site HERE
The tube is ©Vi Nina and is available in her store HERE
Mask of choice. I used Mask 66 from Moon Beams and Spider Webs HERE
Any nice font will do - I used Native Land and you can download it HERE
Install Eye Candy 4000 to your plugins folder
Load your mask to the masks folder in PSP
Install your font to your system
Open AS and minimize for now
In PSP open a new transparent image 700 x 700 - you can resize later if you like
Flood fill with white
Open paper 3, resize to 700 width, paste as new layer
Load your mask with source luminance, fit to canvas and hide all mask checked
Merge group
Open element 9, copy and paste as new layer
Open element 49, resize to about 285 width, paste as new layer and move to the bottom right
Open element 93, resize to about 205 width, paste as new layer and move to the top left
Open element 63, resize to about 290 width, paste as new layer and move right, overlapping the bottom of the clock
Open element 100, resize to about 215 width, paste as new layer and move down and right, overlapping the books
Open element 97, rotate right a bit, paste as new layer and move to the top right
Open element 21, resize to about 175 width, move to the right, overlapping the bottom right corner of the letter
Open element 68, resize to about 225 width, move to the top
Open your Vi Nina tube
I resized to 600 height and then used my selection tool to cut off the bottom just below the woman's wrist
For position, her head should cover most of the flower you just placed
Open element 66, resize to about 180 width, paste as new layer and move down to the right bottom of the woman
Open element 52, resize to about 255 width, paste as new layer at the bottom of the woman
Open element 1, resize to about 175 width, paste as new layer, move to the left of the candle
Go through your layers and add drop shadows to your elements - I used 0, 5, 15, 10, black
IF YOU ARE NOT ANIMATING
If you're going to resize do that now before adding any text
Add your CR and any credits - I used Pixelette, black and reduced the opacity of the layer to 50%
For my text I used Native Land, #6f3387 background, foreground null
Convert to raster layer
Selections, select all
Selections, float
Selections, defloat
Selections, modify, select selection borders, outside, 2
New raster layer
Fill the selection with white
Give it a drop shadow, I used 0, 5, 5, 5, black
Select none
Merge down
Postion where you want it
Delete the white background layer, merge visible and save as a png file
IF YOU ARE ANIMATING
Add your credits and text as above
Click the candle layer to activate it
New raster layer
Duplicate this layer twice so you have three blank layers
On the candle layer - use your freehand selection tool to form a flame shape just outside the existing flame on the image
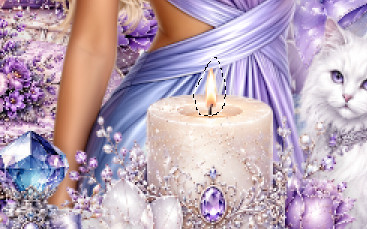
On the top blank raster layer - effects, plugins, Eye Candy 400, fire
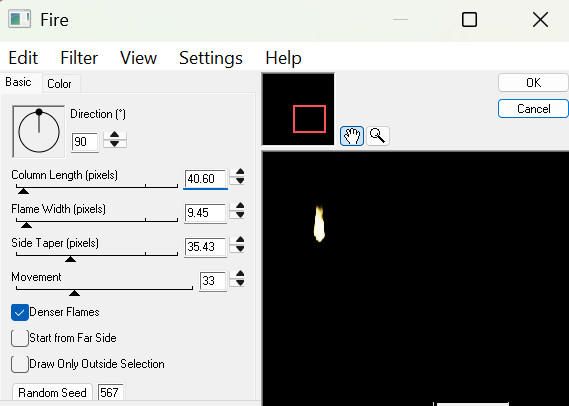
On the color tab, click natural spectrum
Click ok
Click the middle blank layer - effects, plugins, fire - change random seed, click ok
Click the bottom blank layer - effects, plugins, fire - change random seed, click ok
Select none
Click the layer below the girl to activate it
Merge down to and including the white background layer
Copy this merged layer and go to AS, paste as new animation
Duplicate until you have 12 frames and then minimize for now
Open animation 1277 from Sophisticat Simone's package 449
Edit, select all
Edit, copy and then close
Maximize your tag frames, edit, select all
Make sure your slider is all the way to the left so Frame 1 is on your screen
Edit, paste into selection, in frame 1, position where you want it and then click once to set in place
Minimize for now and go back to PSP
Close the eye on the bottom merged layer
Click the top flame layer to activate it
The eye on the middle and bottom flame layers should be closed
Edit, copy special, copy merged
Go to AS and paste as new animation
Back to PSP, close the eye on the top flame layer, open the eye on the middle flame layer and click it to activate that layer
Edit, copy special, copy merged
Go to AS and past after current frame
Back to PSP
Close the eye on the middle flame layer, open the eye on the bottom flame layer and click it to activate that layer
Go to AS and paste after current frame
Edit, select all
Edit,copy
Click frame 3, then paste after current frame
Click frame 6, then paste after current frame
Click frame 9, then paste after current frame
You should now have 12 frames
Edit, select all
Edit, copy and then close
Maximize your tag frames again
Edit, paste into selected frame - Frame 1 again
Position and then click once to set in place
Save as a gif file
Thanks for trying my tutorial - enjoy your tag!!!
|